UPDATED : APRIL 22, 2020
Planning a DIY cake smash at home for baby’s first birthday?
The newest trend when it comes to celebrating your little one’s first year milestone is a cake smash!
What is it you ask? Basically you sit baby in front of a cake and give them free reign.
What could go wrong?
A lot, apparently.
Ours was super fun and so so memorable but I sure learned a few things along the way.
As usual, I didn’t plan ahead and threw something quick together last minute and had quite the mess to clean up afterwards.
Here’s a few helpful tips to help you plan and execute the perfect diy cake smash at home!
Disclaimer: as an Amazon Associate I earn from qualifying purchases. This comes at no extra cost to you.
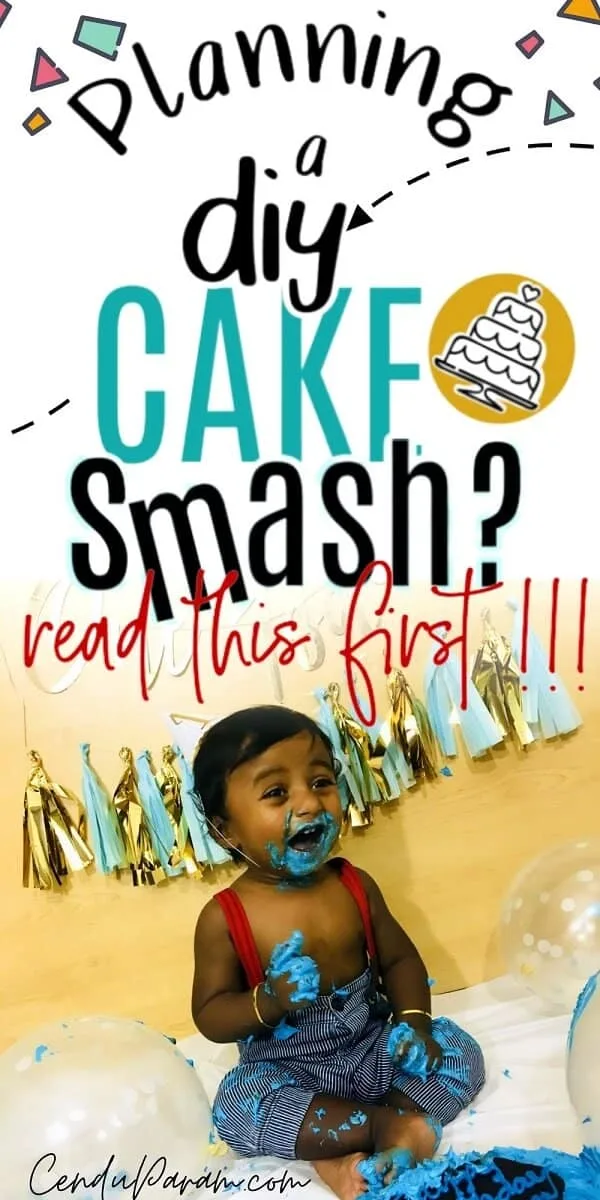
Pick a Cake Smash Theme
Picking a theme for your cake smash can help get you organized. It can help you choose colors and props to create a more cohesive and pretty picture.
You don’t want every random item you can find in your cake smash photos.
It can be as simple or fancy as you want but pick a theme. It doesn’t need to be difficult.
Cake smash themes that have been popular over the last few years include things like: unicorn cake smash, Mr.ONEderful, the ever popular princess theme or even just color themes.
I ,myself, kept it simple, my theme was just blue.
This let me organize something quickly as I wasn’t searching for anything too specific, just pretty blue hues.
You can pick up a little cake smash kit like we did. It makes the job a lot easier since everything is already color coordinated for you.
We chose the Ginger Ray collection.
Take a look:
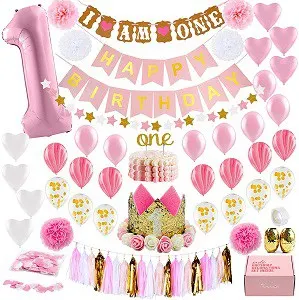
Ginger Ray Pink and Gold Girls First Birthday Cake Smash Kit
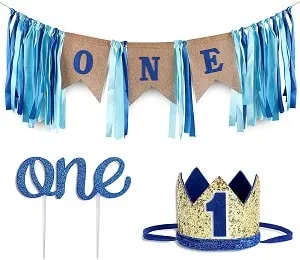
Ginger Ray Blue and Gold Boys Cake Smash First Birthday Kit
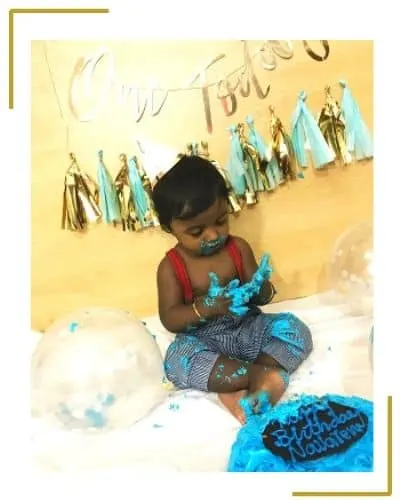
I chose this one because I just really like the simplicity and thought it looked beautiful!
It came with:
♡ One Today Gold Script Sign
♡ Blue and gold tassel garland (some assembly required here but it was super easy – although I will say you have to be careful with the gold ones as they can easily rip if you don’t handle them carefully)
♡ Birthday hat
♡ 5 Confettie Balloons
Here’s a few more awesome options I came across:
Boy’s Cake Smash Banner + Crown
Full Set Baby Boy Cake Smash Kit
This one looks like the one pictured above but just has more stuff like garlands, balloons and more decorations.
Here’s the girl version:
Girl’s Firt Birthday Cake Smash Complete Kit: Pink & Gold
There’s actually so many themed ones to choose from too!
Check out these ones for some inspo:
Dinosaur Themed Cake Smash Set
Carnival Circus Cake Smash Kit
By the way, if you’re going the circus route- look at these adorable ONE letter circus themed sign prop.
I think this kit is a little lack lustre. I woud opt for this one instead even though it’s not first birthday themed and maybe just add a #1 helium balloon.
Jungle Safari Themed Cake Smash Kit
St. Patrick’s Lucky ONE Themed Cake Smash Kit
If you’re still stuck, you can check out this cake smash photography page for some more theme inspiration.
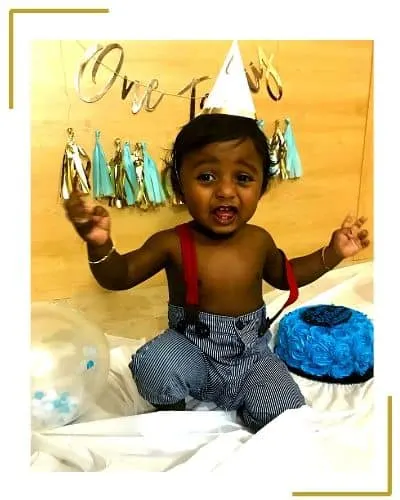
Get Helpers For Your DIY Cake Smash
If you’re anything like me, asking for help doesn’t come easy. I generally prefer to do things myself because I hate to make anyone feel obligated but this isn’t one of those things you can do successfully by yourself.
I recruited the hubby to assist.
When it comes to baby’s cake smash, the more the merrier, but to a point.
Sometimes having too many people in the room (espcially a lot of people baby isn’t familiar with) can hinder the party.
It may make your little one shy away and cling on to you for dear life.
I suggest having at least 1 or 2 extra hands on deck if you want to avoid ending up with a camera covered in frosting. But choose people who baby is familiar and comfortable with.
Delegate photography to one person so you’re free to make silly faces and encourage that sweet little laugh you’re after.
Having at least one set of clean hands available means you won’t be getting cake everywhere.
Pick The Right Cake For Your First Birthday Cake Smash
One of the most important things to consider with your cake smash is the cake itself.
Whether you’re opting for a fancy-smancy $300 theme cake or something a little more budget friendly, keep these tips in mind.
Opt for a creamy frosting as opposed to fondant.
Fondant looks beautiful because it delivers a clean crisp perfect looking cake.
This is better for an event where the cake has to hold up for a while, like maybe the offcial first birthday party.
However, we want a cake that’s got creamy, soft, touchable, spreadable frosting that gets between your toes (like butter cream) for a cake smash.
You wanna get those cake smears all over the face, it makes for adorable pictures.
The other thing to consider is color.
What kind of photos do you want?
I love seeing bright beautiful colors smooshed all over baby’s face. It adds contrast and interest to your photos as opposed to just white frosting.
We opted for a $10 butter cream cake that we ordered at the local grocery store and it worked perfectly.
If you’re feeling particularly ambitious you can even try to DIY the cake yourself.
I loved the look of this DIY giant cupcake cake smash cake.
Check out the video if you want to learn how to make your own.
Another tip: I love chocolate but maybe not for a cake smash because brown smears on the face…I don’t know.
I think bright and light colors just look better and photograph really well.
One more pro tip I want to mention: serve the cake at room temperature!
Make sure to take your cake out before the cake smash and let it come to room temperaure. Your kiddo probably won’t appreicate a cold hard cake.
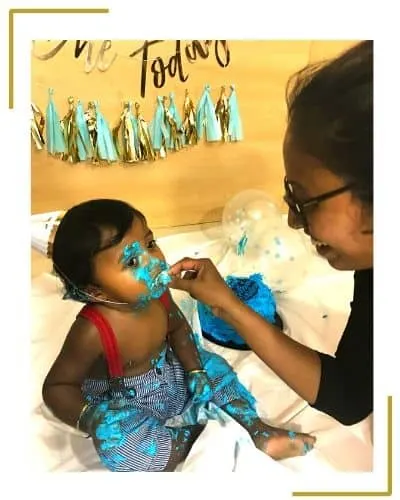
Say Bye-Bye to the Highchair
I know a lot of people do the entire cake smash right on the baby’s highchair and contain the mess that way but I think setting up your photo area on the ground creates much nicer photos and gives you a bigger area to create a nice background and display a few props.
This just means a little extra prep on your part. I got a disposable vinyl tablecloth for the floor so we could just scrunch it up and toss it when we were done.
No muss, no fuss.
This lets you get right up close and personal, you can get pictures of their little hands and feet all covered in cake.
Totally worth the little extra prep IMO!
RELATED POST: Non Toy Gift Ideas That Toddlers LOVE!
Make A DIY Cake Smash Video
If a picture is worth a thousand words, how much is a video worth?
I absolutely love my cake smash photos but what is so near and dear to my heart is our cake smash video.
It’s nothing fancy, just a little home movie we made using our smartphones and then a simple edit on the computer with free editing software.
It creates a memorable keepsake you can show your little one when they get a little older.
The moment is over so quickly, I’m glad I took a video so I can replay this memory over and over (as well as share the moment with family and friend ).
We kept our cake smash small as we didn’t want our little bug feeling camera shy with too many people in the room, this way everyone else was able to witness the fun without having to be there.
If you’re curious, you can take a peek at ours below. This video still gives me all the feels.
PRO TIP: hold your camera horiztontally when recording! I didn’t and then you end up with those black bars on either side.
RELATED POST: How To Celebrate Child’s Birthday Without A Party
Lighting Is Key For Baby’s Cake Smash Photos
Lighting is everything!
There’s no point going through all this trouble just to end up with dark pictures because you didn’t consider lighting.
I totally forgot to consider the light.
We thought it would be a fun way to celebrate his birthday by having a midnight cake smash, only problem, no sunlight.
Without proper lighting your photos will need a lot of editing.
Lucky for me, I have a set of professional lights from my YouTubing days.
This worked for a last minute improv solution but I would have much preferred natural light.
Photos taken in natural lighting just look much better so plan ahead. Maybe even an outdoor cake smash.
The Best Camera For Your DIY Cake Smash
I just wanted to mention that obviously, you’ll get the best results if you’re using the best camera.
At the time that we did our cake smash, I dind’t invest in a DSLR high quality camera. I just used my Iphone and I was pretty happy with the resutls.
Later that year, we decided to take the plunge and actually invest in a good camera since I ended up taking around 5000 photos of my little guy on my phone that year!
Afte buying our digital camera I was actually so bummed I didn’t invest in one sooner. The picture quality isn’t even comparable.
After doing a ton of research we settled on the Sony A6000 Mirrorless camera.
I’m absoutely in love with this thing! It takes DSLR quality photos but without all the bulkiness because it’s mirrorless.
It’s nice and compact so we actually take it with us when we go out.
I only wish I had bought it earlier and used it for our cake smash. It’s definitely one of the best investments we’ve made for capturing our little guy’s precious ‘firsts’.
If you grab one with a tripod it’s super helpful because it allows you to get in the photos too. You can take the picures remotely using your phone + the sony app.
RELATED POST: Practical Toddler Gift Ideas (That Parents Appreciate)
Cake Smash Background and Photoshoot Props: Less is More
It’s easy to get carried away with your background and props, I say keep it simple. You don’t need too many things, it gets too busy and ends up looking more cluttered.
Select a few key pieces that really represent your theme.
We kept it super simply with just some balloons , a happy birthday sign and a little tassel banner.
The focus stays on baby instead of a crowded background. Too many props and your little one might be too distracted to think about the cake.
In this situation, I think less is more.
You’re prop is going to depend on you’re theme of course but here’s a few ideas:
♡ Birthday Crown (Girls) (Boys)
♡ First Birthday Balloon Box Display
♡ 12 Months Milestones Birthday Banner
♡ Birthday Milestones Customizable Chalkboard
DIY Cake Smash Outfit For Baby
Don’t forget your baby’s cake smash OOTD!
This is a great time to have fun with clothes.
Obviously don’t pick something that you’re planning on wearing again for something special in case you can’t get those stains out.
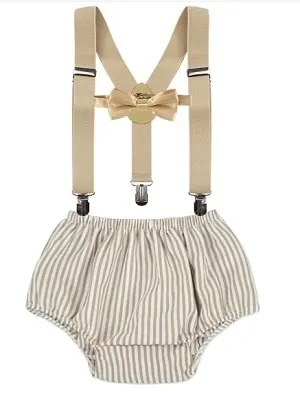
We wanted to keep his top half bare for more cake smears so we opted for a cute pair of pants and red suspenders.
You can put something together yourself or head over to itsy for an awesome (although kinda expensive) cake smash outfit.
Check out some of these adorable ones for inspiration! So cuuuute!
Boys Cake Smash Outfit Bloomers + Suspenders + Tie
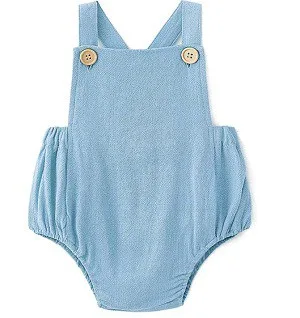
Unisex Baby Romper Bodysuit Assorted Colors
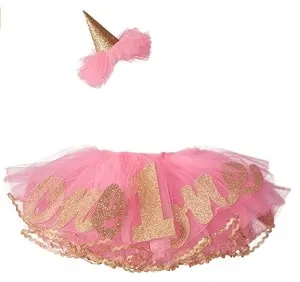
Baby Girl’s Cake Smash Outfit Tutu
Consider Any Allergies
I made sure to give the little guy a bit of cake before the actual cake smash.
He’s got eczema and I never know what might set it off so we’re always cautious about introducing new food.
The last thing I need is for him to gobble half a cake and then find out his little body doesn’t take too kindly to it.
I would suggest doing the same to be on the safe side.
Nudge Them in the Right Direction
Some babies know exactly what to do and others need a little encouragement. My little guy didn’t jump right in like I expected him to.
Maybe it was just too much pressure, we will never know.
He just sat there staring while I excitedly yelled “go on baby, yummy cake!”
That that didn’t work.
So then, I put a little frosting on his lip and his eyes lit up.
After that there was no going back, he jumped right in until he was covered head to toe in cake and frosting (and then so was I).
I was so glad the floor had the plastic sheet!
RELATED POST: Fun Places To Take a 1- Year-Old To Encourage Their Development
Cake Smash Clean up Tips
Keep in mind, a cake smash is meant to be a messy, fun, sensory experience for your baby. With kids comes mess, that’s inevitable.
However, being prepared makes the clean up easier so anticipate the things you’ll need ahead of time and keep them on hand.
As I already mentioned, if you’re doing your cake smash on the floor, make sure to grab a plastic table cloth that you can simple toss when you’re done.
At least the floor is taken care of (mostly) . You might want to grab a few if you’re worried.
Have some paper towels on hand and maybe some baby wipes too. Don’t forget to keep your garabage bag, a broom and dust pan nearby too.
Have a little plastic bag handy as well to throw the cake covered clothes in.
We actually had all his bath stuff set up as well so we could go straight to bath time once the cake smash was over.
DIY Cake Smash Photos At Home
I hope you feel inspired to plan and throw your own DIY cake smash right at home! It doesn’t have to be hard or complicated. It just takes a little bit of planning and organization.
Cake smash photography can get expensive but it’s such a nice keepsake so if you want to go the DIY route, I say give it a try!
Remember, it’s more about the experience than just pretty photos. It’s a special way to celebratee one of baby’s first huge milestones (and yours too, you all survived YEAR ONE!).
Make this an oppotunity to create more cherised memories and take some lovely photos you’ll look back on and love.
Got any more tips or your own cake smash story? I would love to hear them.
Leave me a comment.

Rochelle
Sunday 26th of April 2020
this is absolutely adorable...a wonderful way to capture the memory :)
Nicole
Saturday 25th of April 2020
This is adorable! Much cuter than my last go at a cake smash, lol. I wish I had known kits exist, that's such a smart idea!
Gina Cortez
Friday 21st of February 2020
Hey, My name is Gina. Today is a special day, because I want you to focus on what you do best and allow me to handle my passion, photography editing. When I was a kid, my father had converted the basement into a Dark Room.
I would sit with him as he meticulously developed each roll of film. Chemicals and darkrooms have gone away as technology developed but I stayed up to date and realized my editing skills are way better and more fun!
I am an expert editor with 10 years experience. Let me prove my skills with a no obligation Free Trial.
Contact me by email for more info.
Katie
Sunday 10th of March 2019
Great tips, thank you for sharing! Getting ready for a cake smash now for my almost one year old and he has many allergies, so I really appreciated the allergy tip! Thanks!
Lorena with Motherhood Unfiltered
Saturday 9th of March 2019
These are great ideas. I wish I would have read them before we had my sons first birthday. We did a fondant soccer ball cake and it was so perfect he didn't want to eat it. He probably would have been more interested in an icing cake. We also did it in the high chair and it got extremely messy when he finally realized it was cake.